How to Change Grease in a KitchenAid Mixer
Changing the grease in a KitchenAid mixer means opening the head, scooping out the old grease, and repacking the gears with food-grade grease. Most tilt-head mixers only need this after years of heavy use or when the old grease turns dark, thin or noisy.
On this page (10 sections)
- How do you know a KitchenAid mixer needs new grease?
- What supplies do you need before you start?
- How do you open a tilt-head KitchenAid mixer?
- How do you remove the old grease?
- How do you repack the gears with new grease?
- What should you check before running the mixer again?
- When is changing the grease not the right fix?
- What else should you do while the head is open?
- How do you put the mixer back together and test it?
- Which mixer should you check first?
Changing the grease in a KitchenAid mixer means opening the head, scooping out the old grease, and repacking the gears with food-grade grease. Most tilt-head mixers only need this after years of heavy use or when the old grease turns dark, thin or noisy.
This is a maintenance job, not a repair. It suits an older mixer that still runs but sounds rough.
If your mixer is under warranty or the problem is more than grease, look at the fix first.
How do you know a KitchenAid mixer needs new grease?
The signs are noise, heat and leaking oil. A mixer that has run for years on the factory grease will slowly push out the old grease and leave the gears dry.
Listen while the mixer runs empty on speed 2. Grinding, squealing or a rattle that wasn't there before points to dry gears.
So does a head that feels warm after a light mix.
Look at the hinge area and the seam under the head. Dark grease seeping out, or a thin oily film where the head meets the base, is a strong clue.
Dried grease turns from smooth paste into a hard, dark crust.
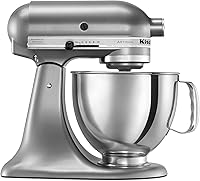
The KitchenAid Artisan 5-Qt Tilt-Head KSM150PS is the mixer most people picture when this question comes up. Its tilt head makes the top easier to reach than a bowl-lift model.
The 10 speeds give you a slow stir for testing afterward.
The KitchenAid Classic 4.5-Qt K45SS is the smaller option. It has the same 10 speeds and metal construction in a 4.5-quart bowl.
If your Classic is the mixer making noise, this is the model to look at before you decide.
What supplies do you need before you start?
You need food-grade mixer grease, a screwdriver, a spatula and a clean towel. A small tub or syringe of grease makes repacking the gear housing much easier.
KitchenAid sells its own grease for stand mixer gear housings. Use that or another food-grade grease rated for this job.
Don't reach for automotive wheel-bearing grease or anything not safe near food.
Have a few basic hand tools ready. A Phillips screwdriver, a small flat scraper or plastic spatula, paper towels and a tray for parts cover most of the work.
A pair of nitrile gloves keeps the grease off your hands.
The KitchenAid Rotor Slicer and Shredder RVSA fits all household KitchenAid stand mixers and runs from the front hub. It's worth having on hand if you want to keep the mixer useful while the head is open.
The four cones handle cheese, carrots and vegetables.
How do you open a tilt-head KitchenAid mixer?
Unplug it first, then remove the head cover screws and lift the cover straight up. Work on a clear counter with a towel under the mixer to catch drips.
- Unplug the mixer and turn the speed control to 0.
- Take off the bowl, beater and any hub attachment.
- Lay the mixer on its side or tip the head back so the cover faces you.
- Remove the screws around the head cover. Keep them in order on your tray.
- Lift the cover off slowly and set it aside without pulling on wires.
The cover on a tilt-head model is a single piece held by several screws. Note how the trim and speed plate sit before you lift them.
Take a photo on your phone if the layout looks busy.
Keep the cord and plug away from the open head. Set the bowl aside so it doesn't tip while you work.
How do you remove the old grease?
Scoop the old grease out with a plastic scraper and wipe the housing clean. Don't use a metal tool or solvent on the gear housing.
Start with the grease you can see around the gears. A plastic spatula or scraper lifts most of it without scratching.
Wipe the rest with paper towels until the housing is mostly clear.
Old grease often sits in the corners and under the gear teeth. Work slowly and keep the parts you remove in one place.
You'll want to see how much was in there when you repack.
Avoid spraying cleaner into the housing. A damp cloth is enough.
Let the housing dry fully before adding new grease.
How do you repack the gears with new grease?
Pack the grease into the gear teeth and the housing so the gears stay coated as they turn. Use enough to cover the working surfaces, not so much that it overflows when the cover goes back on.
Spread a layer over the gears and work it into the teeth with your fingers or a small spatula. Add grease around the shafts and the bearing points you can reach.
A thin coat on the inside of the cover helps too.
Don't pack the housing solid. Excess grease gets pushed out at the seam when the mixer runs.
A moderate layer that coats the gears is the goal.
Replace the cover and start the screws by hand. Tighten them evenly in a cross pattern so the cover sits flat.
Check that the speed plate and trim line up before the final turn.
What should you check before running the mixer again?
Turn the mixer by hand first, then run it empty on speed 2 for a short burst. This shows you whether the gears turn freely and whether anything rubs.
With the mixer unplugged, turn the beater shaft gently. It should move smoothly without a grind.
If it feels stiff or catches, stop and check that the gears are seated.
Plug it in and run the mixer empty on speed 2 for 10 to 15 seconds. Listen for grinding.
A light whir is normal. A hard scrape or squeal means the grease didn't reach a spot or a part shifted.
Let it sit a moment and check for grease at the seam. A small bead is fine.
A steady leak means the cover isn't seated.
When is changing the grease not the right fix?
If the mixer is new, under warranty or making a loud knock, grease won't fix it. Get the cause checked before you open the head.
A mixer that's still under warranty should go to KitchenAid service first. Opening the head yourself can affect coverage.
For an older mixer, a loud knock or a speed control that sticks can point to a worn part, not just dry grease.
Our guide to how to fix a noisy KitchenAid stand mixer covers the other causes of noise. It helps you tell a grease problem from a worn gear or a loose part.
If the noise is mild and the mixer runs fine otherwise, a grease change is a reasonable next step. If the noise is a hard knock on every turn, get the gear housing looked at first.
What else should you do while the head is open?
Clean the head, check the speed plate and look at the bowl and beater for wear. The job is easier when you tidy up around the gears at the same time.
Wipe grease from the hinge and the base. Check the speed plate sits flat and the lever moves freely.
A stiff speed control often gets better once the old grease is out.
Look at the beater and dough hook for coating damage. A worn coating is a good reason to replace the tool.
Our guide to how to clean a KitchenAid mixer walks through the bowl and beater cleaning step by step.
A stand mixer does far more than mix cake batter. If you're deciding what to use yours for, what is a stand mixer used for covers the main jobs.
And if you want to get more from the hub, best KitchenAid attachments lists the ones worth adding.
How do you put the mixer back together and test it?
Replace the cover, tighten the screws, and fit the bowl and beater again. Then run a small batch to confirm the mixer sounds normal under load.
Set the bowl back on its base and lock it. Fit the flat beater or dough hook.
Run a simple mix at speed 2 for a minute. A well-packed mixer should sound steady and stay cool.
Check for grease at the seam after the run. Wipe away a small bead and watch again.
If it keeps leaking, the cover screws may need another even turn.
Which mixer should you check first?
Start with the mixer you use most. If your tilt-head model has run for years on the factory grease and now sounds rough, repacking the grease is the place to begin.
The KitchenAid Artisan 5-Qt Tilt-Head KSM150PS is the model most often serviced because it's the common tilt-head size. Its 10 speeds and tilt head make the job straightforward.
The KitchenAid Classic 4.5-Qt K45SS suits smaller kitchens and takes the same maintenance.
If the noise doesn't clear after a grease change, or your mixer is under warranty, stop and get it looked at. A grease change fixes a dry, rough-running mixer.
It won't fix a worn gear, so read the signs before you open the head.
Frequently asked questions
How often should you change the grease in a KitchenAid mixer?
There is no set calendar interval. Most tilt-head mixers run for years on the factory grease, so change it when the mixer gets noisy, runs hot, leaks oil, or the grease looks dark and thin.
Heavy dough work speeds up wear.
What grease goes in a KitchenAid stand mixer?
Use a food-grade grease meant for stand mixer gear housings. KitchenAid sells its own grease for this job.
Avoid general automotive grease and anything not rated for contact with a food appliance.
Can you change the grease without taking the mixer apart?
No. You need to remove the head cover to reach the gear housing.
A tilt-head mixer comes apart with basic hand tools, but you need to keep track of the screws and set the parts out in order.
Does changing the grease void the KitchenAid warranty?
Opening the mixer yourself can affect warranty coverage, so check your terms first. On an older mixer past its warranty period, repacking the grease is a normal maintenance job rather than a repair.