How to Use a KitchenAid Dough Hook
To use a KitchenAid dough hook, fit it to the mixer, add the dough ingredients, and knead on a low speed until the dough comes together and reaches the texture your recipe describes. Follow your mixer and recipe instructions for speed and timing.
On this page (8 sections)
- How do you attach a KitchenAid dough hook?
- How do you use the dough hook step by step?
- What speed should you use for kneading?
- How can you tell when the dough is ready?
- Does a spiral dough hook work differently from a C-hook?
- What should you do if dough climbs the hook?
- How do you clean and store a dough hook?
- Which KitchenAid dough hook setup fits your baking?
To use a KitchenAid dough hook, attach the hook, add your dough ingredients, and knead at a low speed until the dough reaches your recipe's texture cues. Check your mixer manual for the correct speed and use the recipe's timing as a guide.
The hook is made for kneading yeast dough, such as bread or pizza dough. It can save hand work, but it doesn't replace checking whether the dough is coming together properly.
How do you attach a KitchenAid dough hook?
Turn off and unplug the mixer before attaching the dough hook. Raise or tilt the head as your model's instructions direct, fit the hook onto the attachment shaft, then lower and lock the head before mixing.
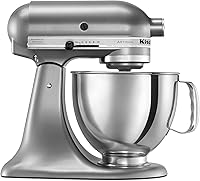
The included hook and attachment method can vary by mixer model. The KitchenAid Classic includes a coated dough hook, while the Artisan product details identify the mixer but don't specify a dough hook in the included components.
Before adding ingredients, confirm the bowl is seated and the hook clears it as your manual describes. If the hook scrapes the bowl or doesn't lock into place, stop and check the model-specific instructions rather than forcing it.
How do you use the dough hook step by step?
Add ingredients in the order your recipe gives, then knead at a low speed. Stop to scrape the bowl only when the mixer is off, and check the dough as it develops.
- Fit the hook and secure the bowl and mixer head.
- Add the measured ingredients according to your recipe.
- Start at the speed your manual recommends for dough.
- Watch for the ingredients to come together into a mass.
- Pause the mixer to check texture and scrape the bowl if needed.
- Continue only as long as the recipe calls for, then remove the dough.
If flour stays at the bottom or the dough moves around in pieces, pause and check your recipe's liquid and flour measurements before adding anything. A small adjustment may be appropriate for a particular recipe, but avoid adding extra flour or water by habit.
For broader mixer setup and speed guidance, see how to use a stand mixer.
What speed should you use for kneading?
Use the low kneading speed specified by your recipe and mixer manual. The Artisan and Classic each have 10 speeds, but the number of settings doesn't mean every speed suits dough.
The Artisan's slide control runs from a very fast whip to a very slow stir. The Classic also has 10 speeds, including stir for combining ingredients.
Don't use a high speed to compensate for dough that isn't moving as expected. Stop the mixer, check the hook and ingredients, and consult the instructions if the dough climbs the hook or the mixer shifts.
How can you tell when the dough is ready?
Use your recipe's visual and touch cues, because dough types vary. Many recipes call for dough that forms a cohesive mass and looks smoother after kneading, but the exact result depends on the ingredients and method.
A mixer can't confirm gluten development by itself. If your recipe calls for a windowpane check or another hand test, stop the mixer and follow that direction.
For guidance on timing and texture, read how long to knead dough in a stand mixer. That guide pairs with the recipe's instructions rather than setting one time for every dough.
Does a spiral dough hook work differently from a C-hook?
A spiral hook and a C-hook have different shapes, so check that a replacement fits your mixer before choosing one. The Mttobo stainless spiral hook is described for 4.5- and 5-quart tilt-head mixers and excludes 5- and 6-quart bowl-lift mixers.
Mttobo describes its spiral design as pushing dough downward while kneading. Treat that as the brand's explanation of its design, not a promise that it will suit every dough or recipe.
The ABTER K45DH is a coated C-shaped replacement listed for a range of tilt-head models, including K45SS and KSM150. ABTER describes it as an aluminum hook with a nylon coating for yeast dough.
Check your model number before buying either hook. For a closer comparison of the shapes, see spiral dough hook vs C-hook.
What should you do if dough climbs the hook?
Stop the mixer if dough climbs toward the attachment shaft. Switch it off before lowering the head or removing dough, then check your recipe and mixer instructions.
A sticky dough may climb more readily, but adding flour can change the recipe's texture. Follow the recipe's guidance and make adjustments only when it calls for them.
If the hook appears too high or the dough catches on the bowl, stop and check the mixer setup. Don't reach into the bowl while the mixer is running.
How do you clean and store a dough hook?
Clean the hook according to its care instructions after each use. Remove dough residue, wash or use the dishwasher only if the hook's instructions allow it, and dry it before storage.
The Classic's included hook is coated. The Mttobo stainless spiral hook and ABTER coated hook are described as dishwasher safe, but care guidance can differ by model and finish.
Keep the hook with the mixer parts you use for dough, and check the coating or surface before the next batch. For the rest of the mixer, follow how to clean a KitchenAid mixer.
Which KitchenAid dough hook setup fits your baking?
Choose the hook that matches your exact mixer model and the care instructions you want to follow. The Classic includes a coated dough hook; the Artisan has a 5-quart bowl and 10 speed settings; replacement hooks require a model check.
For bread baking, compare stand mixers for homemade bread. If pizza dough is your main use, see stand mixers for pizza dough.
Use the recipe and mixer manual for speed, timing, and dough texture. If you want a replacement hook, verify tilt-head or bowl-lift compatibility before ordering.
Frequently asked questions
What speed should I use with a KitchenAid dough hook?
Start with the speed recommended by your mixer manual and recipe. The Artisan has 10 speed settings, including a very slow stir, and the Classic has 10 speeds; use a low setting for kneading unless the instructions say otherwise.
Avoid guessing at a higher speed just to make dough move faster.
How do I know when dough is kneaded enough?
Use the recipe's texture and timing cues, since dough type and hydration affect how it looks. It should come together as described in the recipe, without remaining as loose ingredients at the bottom of the bowl.
Pause the mixer if needed and check by hand.
Can I use a spiral dough hook on a KitchenAid mixer?
A spiral hook can fit some 4.5- and 5-quart tilt-head KitchenAid models, but compatibility depends on the exact mixer. Check the model number and hook compatibility before buying; the Mttobo hook described here is not for 5- or 6-quart bowl-lift mixers.
Can I put a KitchenAid dough hook in the dishwasher?
Check the care instructions for your exact hook. The Classic mixer includes a coated dough hook, while the Mttobo stainless spiral hook and ABTER coated replacement are described as dishwasher safe.
Dry and store the hook as its care guidance directs.